In my Xamarin UI July I’ve decided on a UI that was not only visually appealing but also one that had a little more complexity than you normally see in a Xamarin.Forms apps. I recently attended the Xamarin Developer Summit in Houston Texas, I flew Air Zealand during this trip and I found that the Air NZ app had some nice UI built around the pan/scroll gesture. What I found interesting is that the UI had both a long scroll and a horizontal pan. You can take a look at the original app below.

At first glance I was not exactly sure how I would solve this type of horizontal pan with snap but also the vertical scroll. I had a few different ideas to start on, would I use a collection view? listview? scroll view? or the new carousel view?. I actually attempted to do this in all those controls and they failed miserably, the way that I’ve actually got this working was with the trusty grid and post layout translations. The overall hierarchy looks like this,
ScrollView
–>Grid
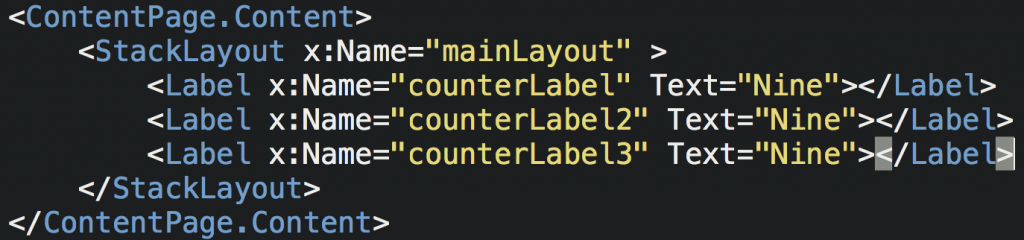
—->Trip1 (StackLayout)
—->Trip2 (StackLayout)
—->Trip3 (StackLayout)
The ScrollView does it’s job for the vertical scrolling but there alot more to the hoizontal pan and snap.
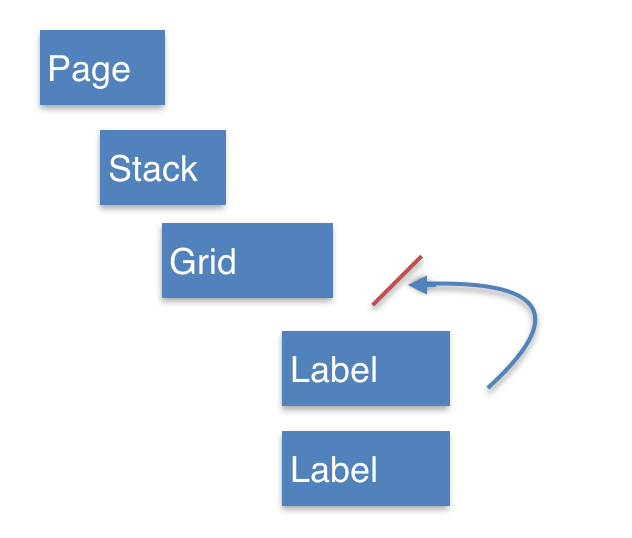
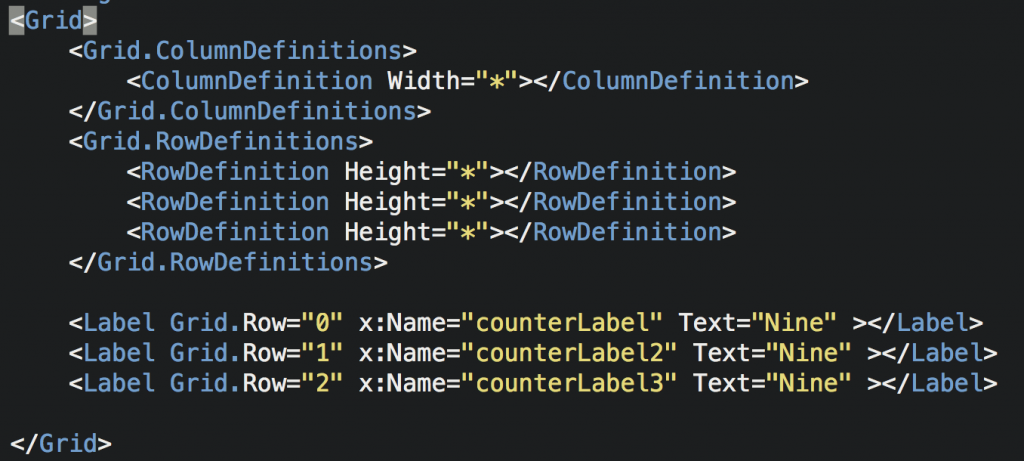
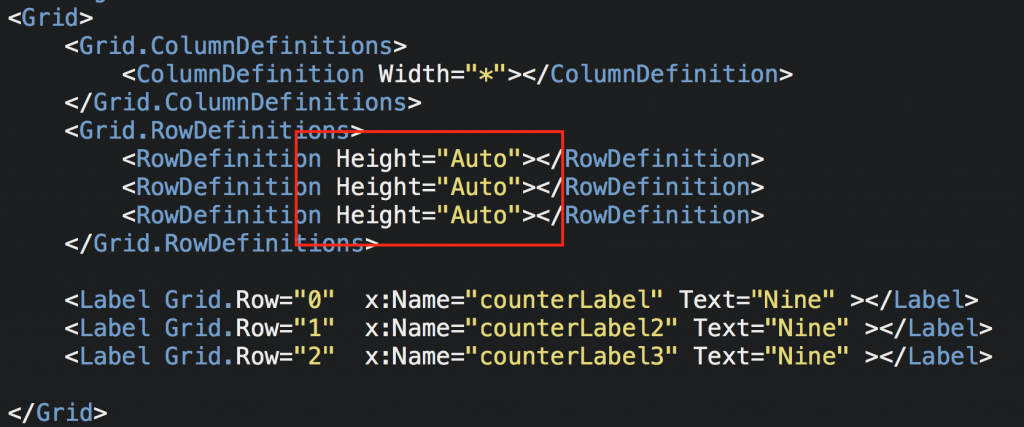
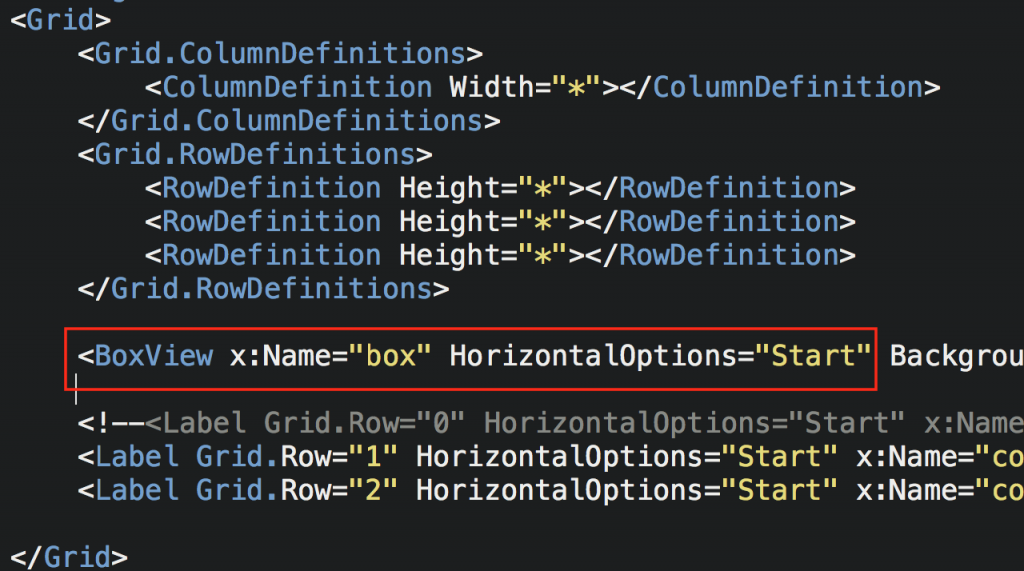
As many of you would’ve seen before the Grid allows you to layer views directly on top of each other. So the Trips are layered on top of each other.
In order to get the horizontal pan and snap I needed to bring a few things together, I’ve used the post layout translations to put views off the screen. eg
ScrollView
–>Grid
—->Trip1 – TranslationX = 0
—->Trip2 – TranslationX = Width
—->Trip3 – TranslationX = Width * 2
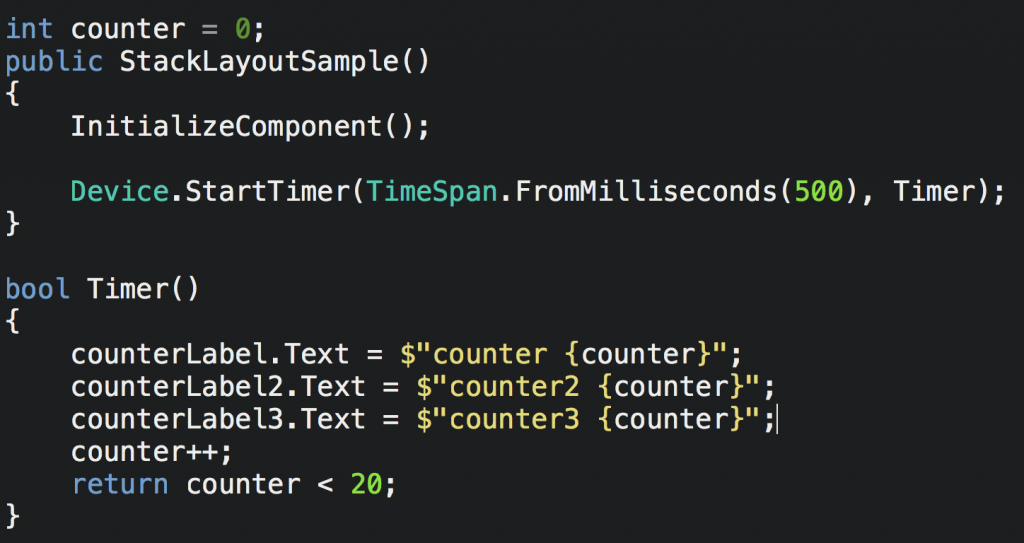
*A little extra note is that I needed to know the width of the view as soon as possible so I overrid the OnSizeAllocated method. As you can see below:
protected override void OnSizeAllocated(double width, double height)
{
    base.OnSizeAllocated(width, height);

    _trips = new List<TripOffset>()
    {
        new TripOffset { Trip = view1, TripBackgroundImage = view0Image, Offset = 0 },
        new TripOffset { Trip = view2, TripBackgroundImage = view2Image, Offset = width },
        new TripOffset { Trip = view3, TripBackgroundImage = view3Image, Offset = width * 2 }
    };
    _currentTrip = _trips[0];
    view1.CalculateOffsets(0, width, 0, false);
    bgImage0.Opacity = 1;
    view2.CalculateOffsets(width, width, width, false);
    bgImage2.Opacity = 1;
    view3.CalculateOffsets(width * 2, width, width * 2, false);
    bgImage3.Opacity = 1;
}
Now that the trips are layed out we need to move them with a pan gesture, I spent alot of time using the Xamarin.Forms PanGestureRecognizer but in the end I could not get both the Forms PanGesture and ScrollView to work nicely. I was a little worried that this might not be possible, but then the awesome MRPanGesture Recognizers came to the rescue. Not only does it work ‘correctly’ with the scrollview it also has a velocity something that the built in Forms gesture was missing.
So now my views look like this.
ScrollView (Vertical Scroll)
–>Grid (MR Gestures Pan)
—->Trip1 – TranslationX = 0
—->Trip2 – TranslationX = Width
—->Trip3 – TranslationX = Width * 2
As we move the PanGesture we change the TranslationX on all the views.
It sounds pretty simple but when your moving things around on a screen based on Pan Gestures then there’s a few things you need to take into account. For example, if a user it actually wants to scroll then we need to disable the pan gesture, as you can see below.
counter++;
if (counter == 3)
{
    var totalDis = panEventArgs.TotalDistance;
    var isVertical = Math.Abs(totalDis.Y) > Math.Abs(totalDis.X);
    Debug.Write($"{isVertical}");
    if (isVertical)
        disabled = true;
    else
        scrollingContainer.IsEnabled = false;
}
There’s also much more to this complete view than we’ve discussed, we’ve got the pan/snap and scroll sorted but there’s many more elements to this view.
Fading and changing background
As you can see in the video when a user snaps between cities the background image of the city also fades out and is replaced with the new city, this one wasn’t too hard.
For the fade I used a white overlay with transparency, then as the user pan’s I change the opacity. As you can see.
//Calculate percentage of pan and then set opacity on overlayt
var percentage = Math.Abs(panEventArgs.TotalDistance.X / this.Width);
whiteoverlay.Opacity = (percentage + .4).Clamp(.5, .9);
Then for the images I just show and hide them using opacity, I’m using opacity so that I don’t cause a layout refresh.
if (trip.Offset == 0)
{
    _currentTrip = trip;
    trip.TripBackgroundImage.Opacity = 1;
}
else
{
    trip.TripBackgroundImage.Opacity = 0;
}
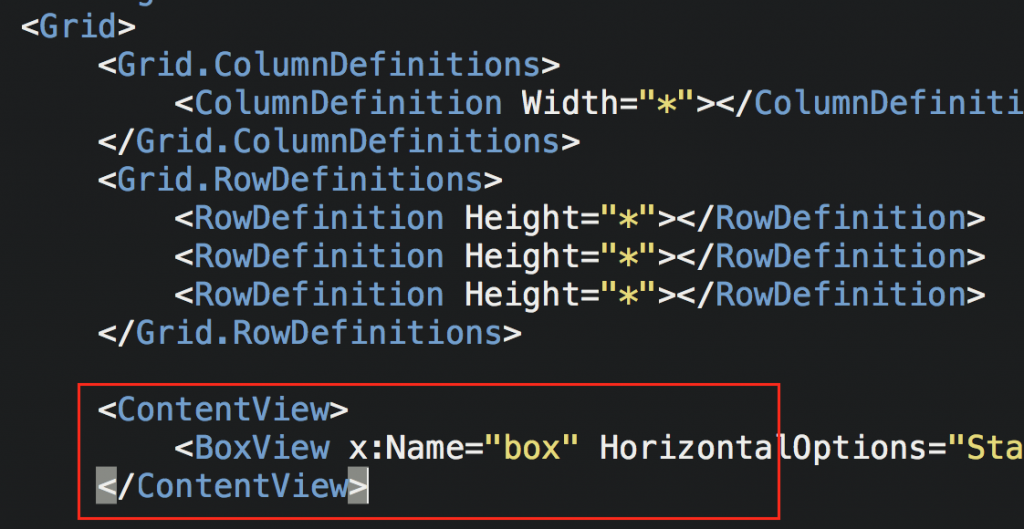
The Circle Images
As you can see in the original view we have a floating image circle off the side of the screen that show the user that the they can pan horizontally this also changes offset and size as the user moves.
This one was a little time consuming, essentially what I needed to do was calculate the percentage of horizontal pan and then do some maths to translate this into an offset and a scale (change the size).
First we need to find if the view we have is to the left or right of centre.
bool isNeighbourOfCentre = Math.Abs(parentCurrentStartingOffset) == containerWidth;
Then we need to calculate the percentage that the gesture has moved.
var offset = Math.Abs(x) - halfOfImage;
var maxOffset = (inverseParentCurrentStartingOffset - halfOfImage);
finalOffset = offset.Clamp(0, maxOffset);
percentageMoved = (finalOffset / maxOffset);
Once we’ve done this we use an easing function to give the movement some bounce.
normalizedTime = Ease(percentageMoved);
finalOffset = normalizedTime * (maxOffset - offsetOfImage);
Here’s our custom easing function.
double Ease(double normalizedTime)
{
    normalizedTime = 1.0 - normalizedTime;
    normalizedTime = Math.Max(0.0, Math.Min(1.0, normalizedTime));
    normalizedTime = 1.0 - Math.Sqrt(1.0 - normalizedTime * normalizedTime);
    return 1.0 - normalizedTime;
}
Then we also need to calculate the scale, in the case below we take the percentage of movement and turn at into a number between .6 and 1 which will allow us to scale the image.
var makeToPointFiveScale = (.5 * (1 - percentageMoved));
var scale = makeToPointFiveScale + .5;
Then we translate the views.
if (animate)
{
    circleImageContainer.TranslateTo(finalOffset, 0, 250, Easing.SinOut);
    circleImageContainer.ScaleTo(scale, 250, Easing.SinOut);
}
else
{
    circleImageContainer.Scale = scale;
    circleImageContainer.TranslationX = finalOffset;
}
Then here’s our final view, it’s definitely not completed like the ‘real’ app but I’m pretty confident I’ve been able to prove my original goals of proving that this app would 100% be possible in Xamarin.

If you want to take a look at the source code then you can find it up on github here. https://github.com/rid00z/AirNZClone
Thanks for reading – Michael